Creating Named Ranges
Creating a named range via VBA is much less involved. You can directly define the Name property of the Range object:
Sheets("Sheet3").Range("A1:D10").Name = "MyData"Selecting Named Ranges
You simply pass the name of the range through the Range object. This allows you to select the range:
Range("MyData").SelectFormatting Named Ranges
As with normal ranges, you can refer to the range using the With…End With statement. This statement tells Excel that any action you perform applies to the object to which you’ve pointed. This not only prevents you from having to repeat syntax, but it also allows for the easy addition of actions by simply adding them between the With and End With statements.
With Range("MyData")
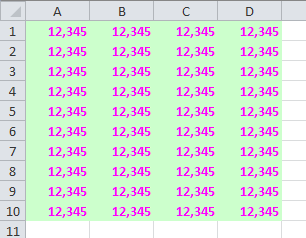
.NumberFormat = "#,##0"
.Font.Bold = True
.Font.Color = RGB(255, 0, 255)
.Interior.ColorIndex = 35
End With
See more about Formatting a Range of Cells In Excel VBA.
Full VBA Code
Sub NamedRanges()
    Sheets("Sheet3").Range("A1:D10").Name = "MyData"
    With Range("MyData")
        .NumberFormat = "#,##0"
        .Font.Bold = True
        .Font.Color = RGB(255, 0, 255)
        .Interior.ColorIndex = 35
    End With
End Sub
See the screenshot:
How to Use This Macro
To use this macro, you can copy and paste it into a standard module:
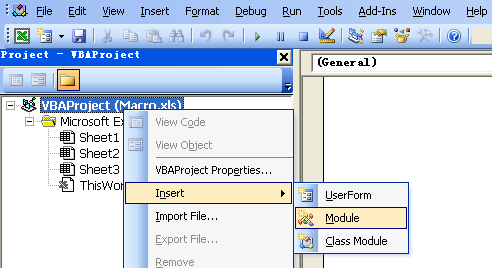
- Activate the Visual Basic Editor by pressing ALT+F11.
- Right-click the project/workbook name in the Project window.
- Choose Insert -> Module.
- Type or paste the code in the newly created module.